**I'm so excited to announce that I've started a youtube channel discussing everything home making. My channel name is Surviving As Mom. Check it out!! http://www.youtube.com/channel/UCmrj6ilyMI5G2hnraXRWpEQ
I love this blog. Had to share:
http://themattwalshblog.com/2013/10/09/youre-a-stay-at-home-mom-what-do-you-do-all-day/comment-page-18/#comment-39760
Thursday, October 10, 2013
Wednesday, October 2, 2013
No more stinky bath towels!
**I'm so excited to announce that I've started a youtube channel discussing everything home making. My channel name is Surviving As Mom. Check it out!! http://www.youtube.com/channel/UCmrj6ilyMI5G2hnraXRWpEQ
For over a year now, I've been plagued by foul smelling bath towels. No matter how often I washed them, or what tricks I used to clean them, the odor never went away. I've tried the recommendation all over the internet of washing them in only vinegar, baking soda and hot water, but no luck. I was just about to throw them all away, but today I tried one last thing. After lots of research, I found one last solution. *FYI- I have a high efficiency washer*
1. I took every (stinky) towel I owned and soaked them in my bathtub with about 4 cups of vinegar with the tub filled about half way with hot water. I left them there for about 4 hours, occasionally giving it a mix. I then squeezed as much water out as I could, then transferred them all to the washer. They still smelled at this point, but there was a film in the bath water so I had hope.
2. I filled both the soap and softener dispensers with vinegar, and half a cup of bleach in the bleach dispenser (even though I have dark colored towels). I also put a cup of baking soda directly in with the clothes. I set the washer to the hottest water temp and let it wash.
3. When that was done, I washed everything again. This time I used laundry detergent and put vinegar in the softener dispenser. Again, I set it to wash on the hottest temp.
To my surprise and relief, when I opened the door, there was no horrible odor. I pulled a towel out and stuck my face in it. Still no odor!! Just fresh, clean towels!! ...and the little bit of bleach didn't affect the colors at all!
I then transferred everything to the dryer, added a dryer sheet and set the temp to high. Done!
My towels were all saved from instant death!!! Hopefully this helps you too. :-)

Wednesday, September 18, 2013
Safety: Child ID bands
**I'm so excited to announce that I've started a youtube channel discussing everything home making. My channel name is Surviving As Mom. Check it out!! http://www.youtube.com/channel/UCmrj6ilyMI5G2hnraXRWpEQ
This past June I had to travel with my children for the first time. We went to St. Thomas for my sister's destination wedding. It was exciting, but I was very nervous about losing my children, especially in a foreign place. I'm also ashamed to admit that I did lose one of my boys one time when I was shopping in Target. It was for only about a minute, but it was terrifying.
The Target experience and the upcoming wedding led me to come up with a plan to allow my children to help themselves if (and when) they ever get lost again. I decided to get them ID bracelets. I wanted something inexpensive and durable. It also had to be waterproof, since they would be swimming a lot while on vacation. With the current craze of rubber message bracelets, I decided that was the way to go.
I went online and started searching. There was an overwhelming supply of choices. I needed a company that made bracelets in child sizes in small quantities (most sold only in bulk) and at low prices. I eventually found a site that worked. I won't name the site because I'm not 100% happy with them. The child's size is a little too big, but it got the job done. In the future, I'll find a different website.
I chose a bright color with debossed printing. I put their first and last name on one side and my cell phone number on the other side. I also ordered 2 bracelets per child, in case one got lost. Since the bracelets are a little large, they can easily slide off my boys' wrists, so while away on vacation, I had them wear the bracelets on their ankles. The bracelets weren't at all tight, but they didn't slide easily over their feet. When we're just going out to the store, they wear them on their wrist.

The next step is just as important as the bracelets. You MUST teach your child/children how to ask for help. They need to know how to save themselves if they are separated from you. Most children will just stand still and cry or worse, hide somewhere. That's not going to help anybody. That may even make them a target for predators.
I taught my children that if they are ever separated from me, to go to an adult for help. This can be tricky when trying to teach children about "good" or "bad" adults. I tell my children the obvious, go to a police officer, fireman, etc., but they are not always around. When I go to a store, I always show my children who works there. I try to teach them to recognize employees by uniforms, stations (cashier, security) or name tags. *I also tell them if they are not sure who to go to, always find a mom with kids to ask for help.* I think this is the most valuable thing I've learned! Chances are, a mom with children will not be a predator. Upon finding an adult for help, I taught them to say "I can't find my mommy" and show them the bracelet, which they know has their name and my number. I also told them that if they get lost together, they need to hold hands and stay together.
I was very proud when one day my son had to use my teachings one day and he did it perfectly! He wasn't really lost, because I could see him the whole time, but he couldn't see me. I didn't run to his rescue because I wanted to see what he would do. Here's what happened:
We went to a local fair which was near a park. Before we went home, my husband and I let the boys play in the park for a little while, which was crowded from the fair. We parked ourselves in a shady spot while the boys went off to play, always in our view. I always tell my boys where I'm sitting when I take them to the park, but only one heard me this time. The other ran off to play too quickly. After a few minutes, one my sons came looking for me, but didn't know where I was. He stood in the middle of the park, looking around. Within a few seconds of realizing he had no idea where I was, he very calmly turned to a nearby mother and told her "I can't find my mommy". At this point, my husband ran over to get him. I could not have been more proud at that moment! My 4 year old stayed perfectly calm and helped himself! He did exactly as I taught him!
It's funny because when I teach my children, I never know what is actually sticking or if they are even paying attention. It was really nice to know that he actually learned this important lesson. Now I am completely confident that if they ever get lost again that they will know exactly what to do.
Make sure you teach your children this important lesson as early as possible! It could really make all the difference in the world!
Monday, September 16, 2013
Cooking: Simple baking
**I'm so excited to announce that I've started a youtube channel discussing everything home making. My channel name is Surviving As Mom. Check it out!! http://www.youtube.com/channel/UCmrj6ilyMI5G2hnraXRWpEQ
I'm a little lazy when it comes to baking. I don't enjoy collecting all of the ingredients and measuring everything. That beings said, I found a lazy way to prepare for baking that I think you will find helpful. It definitely helps me!
I'm a little lazy when it comes to baking. I don't enjoy collecting all of the ingredients and measuring everything. That beings said, I found a lazy way to prepare for baking that I think you will find helpful. It definitely helps me!
Preparation only takes about 15 minutes and I usually make about 5 or 6 bags. First I pick a recipe that I make frequently. In this case, my family loves banana bread, so I will go with that.


First, I label all of the bags with what it makes (ex: "banana bread"). I write the wet ingredients to add, the baking instructions and the date. Line up the empty bags, and measure all of the dry ingredients and put them in each zip lock bag. Squeeze the air out and seal the bag. That's it!

I then roll up the bags and store them in a basket in a cabinet (or pantry). *I only have one bag left right now, but I intend to refill the basket with bags of banana bread, blueberry muffins, corn bread, etc.)

When it comes time to do some baking, I simply prepare the wet ingredients (usually eggs, milk, oil, fresh fruit, etc.), dump in the bag of dry ingredients and mix everything together. Follow the baking instructions and you have a quick and easy fresh baked dessert. It saves me lots of time and I am more likely to bake this way.
Enjoy!
Wednesday, September 11, 2013
Recipe: Roasted sweet potato bites
**I'm so excited to announce that I've started a youtube channel discussing everything home making. My channel name is Surviving As Mom. Check it out!! http://www.youtube.com/channel/UCmrj6ilyMI5G2hnraXRWpEQ
I made a video with this recipe. Check it out! https://youtu.be/peaPJUWJ0wo
I created this recipe to get my family to eat more sweet potatoes. This has become a favorite among my family and friends. Delicious and easy!!


I made a video with this recipe. Check it out! https://youtu.be/peaPJUWJ0wo
I created this recipe to get my family to eat more sweet potatoes. This has become a favorite among my family and friends. Delicious and easy!!
First I peel 2-3 raw sweet potatoes and chop them into bite size pieces (about 1 sq. inch).

Then I put them all in a large Zip Lock bag and add the following ingredients (all ingredients are estimate measurements):
-about 1/4 cup E.V. Olive oil (enough to coat everything)
-1 tsp thyme (fresh is best, but dry will work)
-about 1/4 tsp kosher salt
-2 heaping tablespoons light brown sugar


Toss everything together in the baggy until everything is mixed and spread evenly.
Spread the potatoes on a greased baking sheet.
*At this point, I sometimes add a light dusting of parmesan cheese.

Bake about 25 minutes at 375 degrees until soft and lightly toasted.
*If they look like the bottom is starting to burn, you can toss them a little to finish cooking.

You can finish them with extra salt and pepper to taste. Sometimes I toss a little butter in with them at this point. Not necessary, but butter always tastes a little better.
Enjoy!
The day my son became a puker
**I'm so excited to announce that I've started a youtube channel discussing everything home making. My channel name is Surviving As Mom. Check it out!! http://www.youtube.com/channel/UCmrj6ilyMI5G2hnraXRWpEQ
I had my then 1 year old twins pack in the car, on our way home from a doctor's appointment and suddenly L2 puked all over himself. It was the oddest thing. I didn't know what to make of it, so I cleaned him up the best I could and finished the drive home. A few weeks later, it happened again. I noticed it was happening more frequently, about every other car ride. Then it was every car ride that lasted more than 10 minutes. Finally I came to the conclusion that my poor baby had motion sickness.

I had my then 1 year old twins pack in the car, on our way home from a doctor's appointment and suddenly L2 puked all over himself. It was the oddest thing. I didn't know what to make of it, so I cleaned him up the best I could and finished the drive home. A few weeks later, it happened again. I noticed it was happening more frequently, about every other car ride. Then it was every car ride that lasted more than 10 minutes. Finally I came to the conclusion that my poor baby had motion sickness.
I called his doctor and asked what I could give L2 to help him deal with this since we went out to frequent appointments (specialists from their premature birth). I was very disappointed to learn that there was nothing I could give him at such a young age. He couldn't take anything until he was 2 years old. Hearing this made me feel sick.
This meant two things:
1. I'd have to keep him home as much as possible to avoid the situation altogether. This severely limited our social life (with friends and family) and our activities with the boys such as the zoo, aquarium, carnivals, etc.
2. When we absolutely had to drive anywhere, it meant that my poor baby had to feel sick to the point of vomiting on himself. It broke my heart.
When we had to drive somewhere, making him sick, it was always such a nightmare. We'd count down till he got sick. The aftermath was so disgusting. His clothes would be all wet and dirty, his carseat would get destroyed, with bits and pieces stuck in the cracks and crevices of the seat and belt clips. Then he and the car would stink of vomit. We eventually learned to bring a change of clothes and try to cover him with a blanket to "catch" the mess, but that wasn't very effective. One time when he vomited, it was so thick, he began to choke on it and we had to pull over and unstrap him as quickly as possible to get him out and beat his back to unblock his airway. It was horrible!
Eventually, he learned to communicate (sort of) by crying and pointing to his mouth. This gave us about 15 seconds to pull over and get him out before it happened. It wasn't always enough time. Then my poor baby learned to hold a bucket to catch his vomit. Around 2 years old, he knew when he was gonna be sick and how to catch it (mostly) in the bucket. Again, it broke my heart. It was also at this time that everything changed, finally.
At 2 years old, he was finally able to take something to control his car sickness. This is when the miracle drug Dramamine entered our lives. Finally we were free to roam again. We were no longer trapped at home, missing all the family events, summer activities and just the simplicity of going to the store as a family. It took a little time to learn how it worked, from how much advanced time we needed, to how long after the dose it lasted. Once in a while, he'd still get sick, but overall it was like night and day. Plus, he always has his trusty bucket right next to him in the car, just in case.
Other than the car sickness, we quickly learned that L2 was a puker in general. If he bounced around too much after he ate, he'd get sick. If he was crying too much, or if he fell too hard and got hurt, he'd get sick. Compared to his twin brother, who had the same activity level, he was definitely more sensitive. Can you imagine how hard it is to tell a young child not to play or jump around after eating so he doesn't get sick? Especially when he's trying to keep up with is brother. It's sad.
Now at 4 1/2 years old, we are still dealing with the motion sickness, but we seem to have a better handle on it. I know exactly how far I can drive without having to medicate him first. I also know when he needs to settle down after a meal to digest a little. He's even learned enough to go in the bathroom on his own when he feels sick. Usually he makes it. Sometimes he doesn't. Oh well. That's life with a puker.
I've learned that vinegar is the best thing to use to remove the vomit odor from fabrics and carpets. The vinegar stink disappears after about 30 minutes and the vomit stink goes with it. I also add a cup full to all of my laundry to prevent the odor from sticking to everything. For the car rides, I use a small beach pail. It fits nicely in the cup holder next to him and is big enough to catch the mess. I also keep a large bottle of water and a roll of paper towels in the car for rinsing the bucket afterwards and cleaning up any spills. By this age, he can also give me advanced warning when he's feeling sick so I have more time to prepare and try to prevent it.
The doctor said he'll outgrow this, but I still get motion sickness, so I don't expect it to pass for him either. The few times we forget to medicate him before a trip, he knows enough to remind us. At least we all know how to deal with it now.

Monday, September 9, 2013
Home Improvements: Front Yard Landscaping redo
**I'm so excited to announce that I've started a youtube channel discussing everything home making. My channel name is Surviving As Mom. Check it out!! http://www.youtube.com/channel/UCmrj6ilyMI5G2hnraXRWpEQ
So I've lived in this house for about 6 years now and I've made multiple failed attempts to improve my curb appeal on a minimal budget. To be honest, it is a learning process that I think I may have finally gotten the hang of. Realistically, the whole front needs a major overhaul, including new siding on the house, new pavers, new driveway, and the removal of a huge tree. However, until I can come up with multiple tens of thousands of dollars for that, I will just have to be happy with my modest fix of moving around some existing plants.


This is the other side by the butterfly bush. Near the house is unhealthy azaleas ...and lots of weeds.


So I've lived in this house for about 6 years now and I've made multiple failed attempts to improve my curb appeal on a minimal budget. To be honest, it is a learning process that I think I may have finally gotten the hang of. Realistically, the whole front needs a major overhaul, including new siding on the house, new pavers, new driveway, and the removal of a huge tree. However, until I can come up with multiple tens of thousands of dollars for that, I will just have to be happy with my modest fix of moving around some existing plants.
I started by digging out the old rotted wooden edger and leaving a trench for the replacement. My husband did the replacement last since I wanted to start before he was ready to do the work. I started by digging everything out and splitting bulbs and root balls that needed to be separated. This included about 60 daffodil bulbs, about 30 lily bulbs, some bleeding heart roots, a bunch of astilbe bulbs and various plants and shrubs.
This left me with a clean slate and a nice selection of clean plants and bulbs to use as I needed. After everything was out, I had my husband use a rake to remove the top layer of tree nuts, mulch, leaves, twigs, weeds, and other junk that didn't belong. He then tilled the whole thing to loosen and aerate the soil for me in preparation for planting. After this, he used the rake again to smooth and level the soil for me.
Then it was my turn again. I started by laying everything out in the place that I wanted it, without actually burying it. This gave me the visual affect while allowing me to make easy adjustment before I committed to burying everything. I laid everything in a fashion that would allow a laying effect keeping in mind the time of year that everything will bloom. Shade and sun exposure are also very important especially since my house is North facing so there is only shade that comes about 6 feet from my house. The rest is partial sunlight.
When I was satisfied with the layout, I started digging. A lot! First, I dug a trench and laid most of the daffodil bulbs along a section of the house with the bleeding heart roots just in front of that. I also laid some daffodils in a half circle around the base of the tree. I planted the astilbe bulbs, azaleas, salvias, phlox, mums and hydrangeas. I also planted some lavender, thyme, sage and rosemary that I propagated from existing plants. These are gonna smell amazing next year!!
In addition to this, I moved around a few of the larger items on the other side of the steps for better spacing and placement. I moved the far hydrangea closer to the steps and moved the butterfly bush closer to the house. I relocated the other butterfly bush, all the lily bulbs and the remaining hydrangeas to the back yard.
I still need to get tulips to plant along the walkway, but they aren't available in stores yet. I also want to add a few more mums by the tree. The last thing I need to do is mulch everything, but that will probably come next month.
Before (this is embarrassing):
This is by the tree I want to remove. This is a mess of lilies and a mum. I replaced these with mums.

This is the butterfly bush in the middle surrounded by lilies ...and weeds

This is the small patch in front of the driveway with weeds and wilted bleeding hearts. Right now this looks like a bare patch of dirt, but in the spring it will have daffodils in the back with the bleeding hearts in front.


This is my steps (and baby). I have to replant the potted plants and bleach the concrete. I also need a new "welcome" mat.

This is my hydrangeas on the other side of the steps. There is an unhealthy azalea right next to the steps. I removed the azalea and moved the far hydrangea into that space.

I moved this butterfly bush closer to the house in the place of the far hydrangea.

*Before you see the after, keep in mind that everything is still shocked from the move so it still looks droopy. It takes a few weeks to months for everything to settle in. Plus, it's the fall so everything is in the process of going dormant. I still need to add mulch to everything too. I will post final "after"pics in the spring when everything has settled and bloomed. I can't wait for that!
Along the walkway and edger, I planted alternating lavender and thyme. This is going to smell amazing!

I still need to add more mums here.

Everything looks so much cleaner with the new edger.

It looks rough now, but it'll be much nicer in the spring.

*Better pictures to come in the spring!! Stay tuned!
Freezer Food Storage
**I'm so excited to announce that I've started a youtube channel discussing everything home making. My channel name is Surviving As Mom. Check it out!! http://www.youtube.com/channel/UCmrj6ilyMI5G2hnraXRWpEQ
I have a family of five hungry mouths, so I have a large freezer in my basement to hold our large stock pile of meats and other frozen foods. We usually cycle through everything in about a month, but for those items that stick around longer, I've developed some techniques for organization and avoiding freezer burn.

We do the majority of our shopping at Costco, which has excellent per pound prices on meats. The only headache is that it is all packaged together in large portions that I have to separate myself and freeze into individual servings. This process is a bit tedious, but totally worth it in the end.
The main meats I buy are steaks, ground beef, ribs, pork tenderloins, chicken legs, thighs and boneless, skinless breasts. To store these, I also make sure I buy gallon size Zip Lock freezer bags and aluminum foil. I take each meat, wrap it individually in foil (per serving), then place it in the freezer bag, removing as much air as I could. Then I use a sharpie marker to write the item and date on the bag. With the ground beef, I usually separate it into 1 1/2 to 2 lb portions (eyeball estimate) and roll it into a big ball or log before wrapping it in foil. I don't re-wrap the chicken because it is already in individual servings in an air tight package. I usually just write the date on the package. I've kept meat in the freezer for a year without freezer burn using the foil and bag method. It keeps very well and is very easy to work with. When I am ready to defrost something, I just take the whole bag and soak it in a large bowl with cold water for a few hours. The meat will usually thaw completely within about an hour or two.

For leftover sauces, gravies, soups, I use tow methods. I will either use an old Ricotta cheese container or a Zip Lock freezer bag. I always write the contents and date on them. With the Ricotta container, I use a dry erase marker and the bags I use a sharpie marker. With the freezer bags, I place the empty bag in a large cup or small bowl, folding the ends over the side to hold it open. I then ladle the contents in till it is about 2/3 full. I squeeze the air out and seal the bag. Then I lay the bags flat on a baking sheet and place them in the freezer so they freeze flat like books. This makes for easy storage.

When I store leftovers in the refrigerator, I also use a dry erase marker to write the date on all of my containers because I can never remember how long something has been in the fridge. I find it very helpful and it saves me from throwing away good food.

I hope you find this helpful. :-)
Thursday, September 5, 2013
The Crazy Life of Mom-Boobs
**I'm so excited to announce that I've started a youtube channel discussing everything home making. My channel name is Surviving As Mom. Check it out!! http://www.youtube.com/channel/UCmrj6ilyMI5G2hnraXRWpEQ
A woman's boobs help to define her as a woman. Breasts are what make us feel sexy and beautiful. They can even be our power or our weakness. However, once we become a mother, our boobs become something completely different. They even take on a life of their own...
First, when we become pregnant, they swell up to triple (or more) their normal size, they weigh a ton and hurt like hell. We suddenly look like we belong on National Geographic in Africa with our giant, dark, pancake areolas and huge protruding nipples. They randomly squirt milk in all directions like a sprinkler and even leak at times.
Then, after giving birth, they swell even more, get heavier, get hard and lumpy and hurt so much you'd swear they will burst at any second. Then the new adventure of breast pumps, nursing bras, nursing pads and sucking babies begins. The breasts that used to only be handled by hands other than yours for sexual pleasure are now being handled by nurses and suckled by an adorable little leach that you just gave birth to. Your sexy breasts now provide life sustaining food for your most precious possession. Boobs that went from being a sexy and beautiful accessory now have a real purpose. The milk is another thing. First, you will secrete and thick, yellow, syrupy substance called colostrum that will eventually become the white milk we are used to seeing in our refrigerator. It is odd to see that your boobs can produce milk and you will soon consider yourself to be a cow. I used to "Moo" when I was feeding or pumping because that's all I felt like.
After a few months of nursing, your severely swollen boobs will change shape and size again. They seem to deflate some and fall a little. They've also desensitized some, which is a good thing since in the first few weeks a nursing baby felt like it would suck your nipple right off. There seems to be the illusion that the nipples have turned to leather from all the wear and tear. Sometimes you may wonder if you'll ever feel anything again, until the baby starts chewing and biting. The pain from that will make you see stars! Seriously! Again, you will squirt milk at random times in all directions and leak through your clothes at the worst times. It becomes quite common to sleep with towels and breast pads in order to not wake up completely soaked in sticky milk.
While all this is happening, your boobs are going to take another kind of beating. Your child/children will bite, pinch, elbow, punch, kick and smash your boobs. They will even use them as something to hold onto while trying to pull themselves up. Sometimes I swear they do this stuff on purpose to torture me. You will find bruises, scratches, cuts and pinch marks on your poor boobs. These mounds that once made you feel sexy, will now make you feel used, abused and defeated. You may even feel sick every time you look down and see what reality has done to them.
Once you decide to stop nursing (or pumping), there is the pain and swelling of engorgement all over again. Your once beautiful, firm, amazing breasts will again swell to an unrecognizable size. They will also get lumpy and extremely painful again. The pressure will build up so much that you will swear you are doing permanent damage by not relieving the pressure. The pressure will also cause you to leak again and the slightest touch is excruciating. After a few days of this torture, the milk starts to dry and when it is all done, your poor boobs will seem to have died. They will deflate to a size that is smaller than before you became pregnant and they will look like empty bags because the skin was stretched so much from all the milk.
So now you are left with two, wrinkled, empty, saggy, leathery bags that take odd shapes in different positions. At times, it will be very sad and painful to see your once vibrant, full, bouncy girls looking so old and used. It's enough to make any woman want to have a boob job to try to recreate something that will make her feel like a woman again.
This blog was written in memory of my boobs. After 2 pregnancies (so far) and a full year of almost non-stop nursing, my poor boobs are just an empty shell of their former self. When I am done having kids, I am definitely getting a boob job! May they R.I.P.

You decided to do WHAT?!
**I'm so excited to announce that I've started a youtube channel discussing everything home making. My channel name is Surviving As Mom. Check it out!! http://www.youtube.com/channel/UCmrj6ilyMI5G2hnraXRWpEQ
I find that when I have a certain conversation with people, I get an exaggerated reaction that I haven't quite figured out.
It usually starts with a casual conversation, then the topic comes up. When I answer the question, I am faced with the reaction that I still can't get used to. This reaction includes eyes bulging and a look of horror, followed by question of "Why?", "Are you crazy?" and "Is that really a good idea?". Did I admit that I was planning on murdering a celebrity? No. Maybe I admitted that I was going to rob a bank. Nope. Or maybe I was planning a sex change operation. Definitely not! This reaction came from friends, relatives and even doctors.
What I had actually admitted to was that I was planning to conceive a fourth child. I was going to create another life and expand my family by choice!
I really don't understand what the horror and questioning is all about. I am a responsible mother with a house and a husband who makes enough money to support us (barely at times, but it works). I take care of my own children and I think I do a pretty good job of it. I'm not looking for handouts from anyone, or asking anyone to raise my children for me. I do not live off of the government or of generous relatives. My husband and I are fully capable, stable, loving parents and there is nothing wrong with adding to our already happy family.
At first, these reactions upset me. Not because these people didn't approve of my decision, but because it made me question my own decision. Maybe I am crazy. Maybe I'm not ready. Maybe it is an irresponsible decision. Then I snapped out of it and realized that I don't need anyone's approval to bring another life into this world. I don't need anyone's permission. It is my decision (and my husband's). We know our family best and we know what is good for our family, so who is anyone to question us? I decided to be confident and own my decision. If someone doesn't like it, I don't give a crap. They can just look the other way and carry on with their own life!
Making the choice to have another baby is a personal decision and it is a beautiful thing. No one has the right to make us feel anything but happy and excited! So I take the same stance on this, as I do with many other things in my life. I don't need people to approve of my decisions. It's my decision, and it's an amazing choice. So there!
Don't look so damn horrified. I didn't kill anyone. I am creating a person!! Get over it!

Manners: A Lost Art Form
**I'm so excited to announce that I've started a youtube channel discussing everything home making. My channel name is Surviving As Mom. Check it out!! http://www.youtube.com/channel/UCmrj6ilyMI5G2hnraXRWpEQ
I'm always shocked at how surprised people are to see that my children have manners. Apparently, basic manners are not that common anymore.
I believe this lack of basic knowledge and common courtesy is because:
1. Parents are not parenting their children anymore. Parents are lazy and don't teach or discipline their children the way our parents did when we were younger.
2. Most households require two working parents, so there is less interaction to teach the children necessary life skills including manners. Parents try to spend more quality time with kids in the limited time than using that time to teach and discipline their children.
These are not assumptions that I've made, but rather what I've observed and experienced in my surroundings.
When I was a kid, mother was home full time and I believe that made a difference. She taught us (all five children) basic manners, such as:
*Say "please and thank you".
*Give up your seat to someone older or weaker than you.
*Don't interrupt talking adults.
*Answer someone when they talk to you.
*Look at someone when they talk to you.
*Hold the door for people.
*Don't talk back when an adult scolds you or tells you to do something.
*Be respectful of your elders.
*Offer to help people who are older or weaker than you.
...and the list goes on.
I didn't come from a high class family, but I did learn these basic things. As far as I knew, everyone learned this stuff. I'll admit, I'm still working on some of these things with my own children, but at least I'm working on it.
It angers me when I see children and teenagers who don't follow these rules and I blame the parents completely. Just like if my children were rude and impolite, I would take 100% of the blame since I am home with them 98% of the time. The responsibility falls on my to teach them what they need to know.
I remember one day I was in the mall during the Christmas season and I saw a teenage girl (maybe 14 or 15 years old) yelling at her mother because she wanted to buy more stuff and her mother said she didn't have anymore money. The girl was yelling and cursing in her mother's face, while the mother just stood there looking like a scared child. Then I almost fell over when the girl slapped her mother in the face, threw all of her bags on the floor and walked away while her mother just stood there looking confused. From that moment, I made a vow to myself that my children would NEVER behave like that! That was just beyond unacceptable! If I did that as a teenager, or even now, my mother would have beat my ass right there!
To me, that experience just sums up the problem with kids and teenagers today. They have been allowed to run wild with no discipline and this is now the consequence. Children are also not held responsible (by their parents) when they do misbehave. (Theoretically) If I had done something wrong and ended up in jail, my mother would have left me there to teach me a lesson. I would do the same with my own children. Now parents bail their kids out and make excuses for their behavior. Unacceptable!! They are not learning consequences and accountability.
So preventable and so sad. Parents need to start parenting again and they need to take responsibility for their children's misbehavior. It's not that hard to teach right and wrong. The lessons are there everyday all around us.
Something needs to change. I'm afraid of what the future holds if this doesn't change. People forget that these kids are going to grow up to rule the world.

Sunday, September 1, 2013
If Only I Had as Much Energy as my Kids...
**I'm so excited to announce that I've started a youtube channel discussing everything home making. My channel name is Surviving As Mom. Check it out!! http://www.youtube.com/channel/UCmrj6ilyMI5G2hnraXRWpEQ
I just don't get it. How is it that my children can wake up at 7:30 am, have a very active day, including two long car trips (about 2 hours each way) and still be bouncing off the walls an hour after their bedtime?!
We went today for a family BBQ in Staten Island and spent over 7 hours there. The older boys swam in the pool for the majority of the time while the baby just bounced around from person to person with a little pool time in between. There must have been 25 kids there, from toddlers all the way up to teenagers. There were also plenty of fun adult cousins, aunts and uncles to play with. The amount of jumping, swimming, running and laughing was enough to make any kid pass out the second their butt hit the inside of a car. Not my children! All three of them stayed awake the entire ride home and just bugged my husband and I who were exhausted and ready for bed. They asked question after question and managed to fight each other the whole way.
When we finally got home, hubby and I were struggling to stay awake. We were hungry and tired, but we still had to get the boys in the house, changed and in bed. However, this was not going to be so simple tonight. Somehow, they were endless balls of energy, bouncing off the walls. They were jumping on my poor hubby who was laying on the floor, trying to wrestle with him. They sensed our weakness and took full advantage. After about an hour, hubby finally got up to get everyone moving in the upstairs direction. Even on they way up the six steps to their bedroom, they were still jumping, bouncing, yelling, and just trying to instigate a wrestling match with daddy. At 9:30, an hour and a half after bedtime, they were finally in bed. It took another 10 minutes for them to stop talking and finally fall asleep.
We weren't out of the woods yet. The baby still has not fallen asleep. It is currently 10 pm and he is still running around the living room causing havoc. I've already tied three times to put him to bed, but he is must not having it. Sadly, he doesn't look any closer to going to bed than he did an hour ago. All this while I am sitting here, falling asleep on myself. I just don't get it!!
I only wish I had that much energy! Oh, the things I could accomplish! Daily life would not be such a struggle if I had endless energy like my children. The house would always be clean, the laundry would always be clean and folded away, dinner would always be amazing, and I might even be able to work part-time at night. But alas, I am just a tired, beat up mother who is too tired to eat at times. Oh well. I guess that's the sad truth of being an adult. Too much to do, and too little energy to do it.

Saturday, August 31, 2013
parentwin: The Day All the Fucks Were Gone - Guest Post
**I'm so excited to announce that I've started a youtube channel discussing everything home making. My channel name is Surviving As Mom. Check it out!! http://www.youtube.com/channel/UCz2xg_4pON1go7UK2ziD5JQ?sub_confirmation=1
Love this one!
parentwin: The Day All the Fucks Were Gone - Guest Post: A while back I was having a conversation with some online friends and most of us were complaining (me at the forefront) about how very few f...
Love this one!
parentwin: The Day All the Fucks Were Gone - Guest Post: A while back I was having a conversation with some online friends and most of us were complaining (me at the forefront) about how very few f...
Cleaning: How to Clean your Glass Top Stove
**I'm so excited to announce that I've started a youtube channel discussing everything home making. My channel name is Surviving As Mom. Check it out!! http://www.youtube.com/channel/UCz2xg_4pON1go7UK2ziD5JQ?sub_confirmation=1
Cleaning a glass top stove is not as scary or difficult as many people think. In my experience, I found that you do not need the special glass top cleaning agent with the special scrubber sponge that the manufacturer claims is necessary. (*Disclaimer- Not following the manufacturer's directions may damage your cooktop.) Again, this is my own experience that no damage has occurred from my cleaning practices. Any scratches that I have on the surface are from my pots and pans during cooking. All I use is a regular dish sponge with a scrubber side and Dawn dish soap. I use this method to clean my stove every time. Even with the dirtiest messes, including grease splatter from frying, your stove will be clean and shiny.
Step 1:
Wipe all debris off the surface.
*If you have burnt on rings around each burner, you can use a scraper (flat razor tool) to scrape everything up first. I usually do this once-twice a year.
Step 2:
Using a very wet, soapy sponge, wring out soapy water onto the surface of the stove.

Step 3:
Use the scrubber side of the same sponge to spread the soap on the entire surface and scrub in a circular motion until everything feels nice and smooth.

Step 4:
Either use the same sponge or a new soap free sponge to wipe up suds, rinsing between each wipe. The purpose of this is to clean the soap off the stove.

Step 5:
Use a dry paper towel to wipe up any excess water and soap so the surface is nice and dry. If you have any ridges or seams (as I do around the edge), be sure to use your fingernail to get the paper towel in the ridge to get out all residue and soap.

Done!! That's it!

The Illusion of the Weekend
**I'm so excited to announce that I've started a youtube channel discussing everything home making. My channel name is Surviving As Mom. Check it out!! http://www.youtube.com/channel/UCmrj6ilyMI5G2hnraXRWpEQ
I used to get excited for the weekend. The plan was to get things done that I couldn't do during the week. Usually because I needed my husband home so he could keep the kids occupied so I could focus on the task at hand. I'd also plan to run errands on the weekends. However, this was never the case. The illusion that I'd get more done during the weekend than during the week. This is what I refer to as "The Illusion of the Weekend".
It took me about 3 1/2 years to acknowledge and accept this fact. Because instead of accomplishing XYZ on the weekend, I'd end up worse off than where I started. I found that when hubby was home, I'd get less accomplished and the house would be messier than it was on Friday afternoon.
Most, if not all of my errands are done on the weekends, when they actually get done. This is simply because it's just faster and less stressful to me than bringing 2 preschoolers and a toddler to multiple stops with me. Between getting in and out of the car, strapping them in the car seats, opening and closing the stroller, constantly reminding them to stay near me, telling them "no" every time they insist that we need to buy something stupid, and just being distracted by 3 complaining children, it is just too much headache to bring them with me. To run errands, I generally leave them home with my husband and I get about 3 hours of freedom to hit as many stops as I can squeeze in. Although, many times hubby likes to make it a family event and we spend the majority of the day making multiple stops with the entire family. Sometimes I feel as though my husband is just another kid to control. Many times I find him dilly-dallying with toys and electronics while I'm trying to hurry up and accomplish something.
Any big projects I plan for the weekend usually get pushed off or only partially done. Maybe I want to clean out my basement. Or redo my landscaping. Maybe I want to clean out my closets and purge all unused clothing. It could even be as simple as filing away all of my important papers. It just usually doesn't happen. Sometimes it's my own laziness and sometimes it's just a lack of time and cooperation. If I'm lucky, maybe I'll get two of those things done this year. I have big dreams, but not much time or energy to accomplish them. Quite frustrating!
I also have to fight with my husband for time for tasks. He does most yard work, such as mowing the lawn, week control, garbage control, and just general maintenance. Many times I'll request a few hours for something and he'll fire back with "Well I have to do xyz", so I end up having to push off my needs so he can do his thing. However, this wouldn't be an issue if he learned a little time management. He likes to sit around being lazy until 2pm until he decides to start his work. Meanwhile, all those hours have been wasted. That is precious time that I could have gotten something done. I have tried to share the time and suggest that I will do my stuff early while he watches the kids, then he can do his thing later when he's ready. He doesn't see it as me trying to compromise because I'm met with resistance. In his mind, somehow, this will prevent or delay him from doing his stuff. It's so frustrating!!
Don't get me wrong, my husband is wonderful. He works very hard every day to provide for and take care of his family. He is also kind enough to get up with the kids so I can sleep in a few hours on the weekends. He is entitled to a day (or 2) of rest. I get lazy some days too and don't want to do anything. However, when his laziness interferes with my job of maintaining our home, it irritates me a bit. I feel that most times when I try to encourage or motivate him to do something, he just complains and resists. I feel like I'm pulling teeth sometimes. Even something like trying to take the kids out for a few hours to do something fun like go to the park or a local fair, I have to really push him. Oh well, no one is perfect!
Now I'll complain about myself...
I find that I tend to be a little lazier and more lax when he's home. I get less cleaning done, just because, and the house gets quite messy. I can't explain it. Hubby's presence also naturally contributes to the mess and I am less motivated to clean up after one more person. The kids make a bigger mess, the sink fills with dishes faster, the laundry piles up quicker and it makes me want to do less and less. My habit of doing a little each day (during the week) completely disappears on the two "S" days. It's a strange thing.
Then there are of course, those days when we are not home because we have an event with family or friends. I don't even bother with those days. It's obvious that I'm gonna be too tired to do anything when we get home.
Now that I've finally accepted all of these facts, I've learned to make the weekend my days of rest too. If the opportunity presents itself to take on a task, then I will. However, most times, its a crapshoot! So I deal with it and move it. That's life. Just go with it!

Friday, August 30, 2013
Cleaning: Controlling Dog Odor
**I'm so excited to announce that I've started a youtube channel discussing everything home making. My channel name is Surviving As Mom. Check it out!! http://www.youtube.com/channel/UCmrj6ilyMI5G2hnraXRWpEQ
I have a large dog that I love dearly, but he drives me nuts! One thing I've always hated and was terrified of having in my own home is DOG ODOR. I often feel like I'm fighting a never ending battle trying to keep my home smelling as fresh as possible.
My dog is a 5 1/2 year old German Rottweiler named Osiris that is the sweetest monster you could imagine. We bought him from a breeder in California after tracing his bloodline to a dog that my husband grew up with as a kid.
Osiris looks scary, but he is a big mush. He is also a fantastic big brother. My 3 boys climb on him, beat him up, steal toys from him, and just annoy him and he has always been so patient with them. He loves to play outside with them and chase them around when they drive their power wheels in circles. He is very smart and easily trained. He knows most of the necessary commands visually as well as audibly. We even taught him a few cute tricks, like holding a treat on his nose, or rolling over for a belly rub.
He is incredibly loyal. No matter where I am in my house, he is always laying at my feet. It's actually kind of annoying sometimes, but still cute. He is very protective of our property and family. I never have to worry about our safety in our home or yard when he is around. I take great comfort in his company when I am alone in the house without my husband, especially at night. It's not often that my husband isn't around, but it does happen from time to time.
Back to the topic...
Having such a large dog is definitely a lot of work. Besides disciplining him regularly, as you need to do with such a large dog, there is the cleaning. Sometimes I feel like I can't keep up when he sheds twice a year (for a few weeks each), when he tracks mud into the house, or when he lays in my bed after getting dirty and leaving a big brown spot where he laid.
Dog care:
I try my best to bath my dog at least once a month using an odor controlling shampoo. Keeping the dog clean is the first major step in the battle of odor control. When I slip and miss a month, you can definitely smell the difference!
Vacuuming:
Like any animal with fur, my dog sheds. He actually doesn't shed as much as some other dogs, which is nice, but there is always some hair that he loses, especially when he sheds twice a year. Normally, I can get away with vacuuming my house 2 times a week. I almost never sweep. I hate it! Especially when you have a dog and 3 small kids that think the dirt pile is a good place to dance around in. So, I vacuum my entire house. Carpet, hardwood floors, ceramic tile, EVERYTHING! I have a Dyson upright and I love it! It has incredible suction and doesn't get clogged. When he is in his shedding weeks, I have to vacuum daily or I will have huge hairballs in every corner of the house. I guess this can be a good thing because it keeps me on track.
I have hardwood floors throughout most of my house and ceramic tile in my playroom/den and bathrooms. In each of the main rooms, I have an area rug. No full carpets.
The oil in his hair is naturally going to leave a residue on everything, and this is where the odor comes from. To combat this on the rugs, I use a few different things in addition to vacuuming.
-Every so often, as needed, I sprinkle baking soda on my rugs and let it sit for about 15-20 minutes before I vacuum.
-After vacuuming, I spray the rugs and all fabric surfaces with Febreeze (my best friend!). I usually use the Allergen Reducing formula, but I recently found out there is a specific "carpet" formula. I will have to try that at some point. I usually use the Febreeze for a quick fix, especially if I am expecting company.
-I wash the hard floors about once a week with Pinesol, using my Libman Freedom mop.
Furniture:
Couches: I have leather couches, which I feel is necessary with small kids and a dog. However, you need to carefully clean in between the cushions since crumbs, hair and odor can get trapped there. I have a few things that I do...
-First I use a pointed (or narrow) nozzle attachment on the hose of my vacuum, use one hand and foot to spread the cushions and vacuum the creases, spaces and seams. Make sure to get in between the cushions, behind the seat cushions (under back cushions), and under the arm rests. If there is a strong odor, you can sprinkle some baking soda in the spaces first and let it sit about 15 minutes before vacuuming.
-After vacuuming, I take a fresh dryer sheet and wedge it and my hand into all the space and rub it around to spread the scent around. Sometimes after I rub the dryer sheet around I'll leave it in the space between the seat cushion and back cushion until I clean them again.
-Then I wipe the whole leather surface with a wet washcloth and a mild cleaning solution (pinesol or dish soap).
Bed: No matter how much we fight him, my dog loves to sleep in my bed, even though he has a beautiful bed of his own right next to ours. This is a major problem for me because it causes a strong odor in my room and in my bedding. He has also stained ever set of sheets and blanket we've owned. So, besides changing my sheets weekly, I have to wash my bedding (blankets) and mattress liner monthly. Unfortunately, I learned the hard way that you can't wash most comforters this often without destroying them. That being said, I just bought a new down comforter with a throw (blanket) over it. The goal is to keep the nice down comforter nice and clean by keeping it covered with the throw. This way we can just wash the throw as needed. I'm not sure how long this will last since it is quite warm to sleep with this arrangement. I'm pretty sure that at some point soon, we'll have to use a duvet cover instead of a throw to protect the comforter. I also give my bare mattress a light spritz of Febreeze before I replace the sheets.
The same cleaning routine is also done in each of the other bedrooms- sheets weekly and blankets every other month (since the dog doesn't sleep in their rooms).
Other stuff:
In addition to the rugs and beds, I also wash all throw blankets (in living room) monthly and curtains every few months. I dust most surfaces weekly using Pledge. Keeping dog hair and dust under control is an important step in the process of odor (and allergy) control. It is also good to open the windows (if the weather permits) and air out the house. Fresh air is always good. I have central AC, so my windows are usually closed. In the spring and fall, I will often open my windows for the day to allow the cool breeze through my house.
I'll admit, I don't ALWAYS stick to this plan, but I try my best. There are also days that no matter what I do, there is still an odor. This is usually on very humid days. On those days, I just suck it up and don't allow any visitors over :-)
Personal Business Recommendation: Interior Designer
**I'm so excited to announce that I've started a youtube channel discussing everything home making. My channel name is Surviving As Mom. Check it out!! http://www.youtube.com/channel/UCmrj6ilyMI5G2hnraXRWpEQ
For those of you are planning a renovation in your home, or just looking for a minor improvement, please check out http://merriinteriors.com.
Meredith Weiss is an incredibly talented interior designer located in Commack, NY. She has an amazing portfolio that I often look through as I try to imagine my dream kitchen. I haven't used her yet for my own home, but I would love to if my budget ever permits. She can work with many budgets and has very reasonable fees and prices!
Her work has been featured on Houzz and she will soon have one of her kitchens featured in a National Design Magazine!
Cleaning: Bathroom (step by step)
**I'm so excited to announce that I've started a youtube channel discussing everything home making. My channel name is Surviving As Mom. Check it out!! http://www.youtube.com/channel/UCmrj6ilyMI5G2hnraXRWpEQ
We all have the wonderful task of cleaning the bathroom. Most of us don't like it! However, as a family of 5, to which I am the only female, cleaning my two bathrooms often is a requirement.
The pics in this blog are from my main bathroom that is used by everyone including the kids. It is possible to have a beautiful, clean bathroom, even with preschoolers. Their bath toys are hidden under the sink in a plastic basket purchased from the dollar store.
My most used chemicals and tools for this job are: Peroxide, Windex, Clorox Bleach wipes, Vinegar, Clorox Toilet Wand, a soap dispensing scrubber (filled with 50/50 Dawn Soap and vinegar), Febreeze and the Libman Freedom Mop with Pinesol.
You can refer to my other blog:
Cleaner Cleaning: Vinegar, peroxide and baking soda


After years of practice, I think I've finally perfected my routine. Here it is:
1. Cleaning the vanity/sink:
-First I clean all excess items off of the counter. This usually includes hair accessories, brush, bath toys, and anything else that can usually accumulate.
-I use a Clorox Bleach wipe to wipe the faucet, handles, counter top and the items I keep on the counter (Q-tip holder, toothbrush holders, wet wipe box).
-I use the Clorox Toilet wand with a fresh cleaning bad to scrub the sink. *When you are done, don't throw it away. You will use the same pad to clean the toilet.

2. Clean the toilet:
-First I use a Clorox Bleach wipes to clean all the surfaces of the toilet tank, including the flush handle.
-Next I clean both sides of the toilet lid and seat, paying careful attention to the cracks and seams. I then wipe of the toilet rim, including the odd space between the seat and tank.
-Use a clean wipe to clean the entire outside of the toilet (below the rim). This includes the structures on the backside under the toilet and the joint where the toilet meets the floor.
-Lastly, I use the Clorox Toilet wand (with the same pad I used to clean the sink) and clean the inside of the toilet. Don't forget to clean under the rim where the water comes from. Discard the pad in the trash when done. Do Not flush it!

3. Clean the bathtub:
I'll admit that I save this step for when I'm actually in the shower. For me, it's just easier on my back than leaning in an awkward position trying to scrub everything. For general cleaning, I use my soap dispensing scrubber filled with a 50/50 mixture of Dawn Dish soap and vinegar. I make sure to scrub the walls, window sill, plumbing fixtures, bathtub and rim of tub. Make sure to pay careful attention to tight corners and angles. For the stubborn, hard to clean "ring around the tub", I use the Mr. Clean Magic Eraser after I've scrubbed and disinfected everything with my soap dispensing scrubber.
Back to the regular cleaning routine:
-I use a clean Clorox Bleach wipe to wipe the edges and outside of the bathtub, including the seam where it meets the floor.
-I finish by spraying the shower curtain with Febreeze to freshen it up a little.

4. Extra stuff:
-At this point, I clean my mirror with Windex, tidy up my towels and magazines, and empty the trash can. I also like to use a Clorox Bleach wipe to clean all door knobs, light fixtures, light switches, vanity drawer handles, picture frames, and ledges.
5. The floor:
After I've finished everything else, I move on to the floor. This is done in multiple steps.
-First I take everything off the floor and move them into the hallway.
-Vacuum the entire floor, using the hose and nozzle for getting behind the toilet, in corners and under radiator. Yes, I vacuum my bathroom. I find it easier and more thorough than sweeping.
-Next, I spray the base of toilet, floor, and walls under, around and behind the toilet with Vinegar and peroxide. Use a generous amount and make sure to thoroughly soak the grout lines. Let it sit a few minutes. Wipe it up with a used towel or lots of paper towels.
-The last thing I do is use my Libman Freedom mop with Pinesol to wash the floor. Don't forget the area around the toilet.
*Once you put the trash can and (in my case) step stool and magazine holder back in place, you are done!! This takes me about 20 minutes to complete. Nice and easy!
*Additional Bits and Pieces*
-To neatly store shopping bags for the trash can, I keep them in an empty tissue box under the sink. I have one in each bathroom.
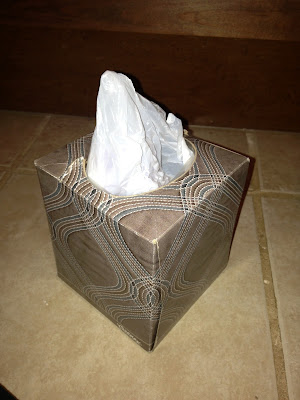
-To neatly and stylishly store magazines and other reading materials, I use a rectangular planter that matches my decor.

-To neatly and easily store Clorox wand refill pads, I keep them in an empty glass jar. This also allows for hands free dispensing. I keep one jar with a wand in each bathroom.

-I try to keep the space under my sink as organized and clutter free as possible. I try to keep cleaning products I use regularly (though this picture has a few extras). I also try to keep the toilet paper nicely stocked (again, not so much in this pic).

Hopefully this blog has helped to make your bathroom neat and clean, and you learned that it's not that hard to do.
Happy Cleaning!!
We all have the wonderful task of cleaning the bathroom. Most of us don't like it! However, as a family of 5, to which I am the only female, cleaning my two bathrooms often is a requirement.
The pics in this blog are from my main bathroom that is used by everyone including the kids. It is possible to have a beautiful, clean bathroom, even with preschoolers. Their bath toys are hidden under the sink in a plastic basket purchased from the dollar store.
My most used chemicals and tools for this job are: Peroxide, Windex, Clorox Bleach wipes, Vinegar, Clorox Toilet Wand, a soap dispensing scrubber (filled with 50/50 Dawn Soap and vinegar), Febreeze and the Libman Freedom Mop with Pinesol.
You can refer to my other blog:
Cleaner Cleaning: Vinegar, peroxide and baking soda


After years of practice, I think I've finally perfected my routine. Here it is:
1. Cleaning the vanity/sink:
-First I clean all excess items off of the counter. This usually includes hair accessories, brush, bath toys, and anything else that can usually accumulate.
-I use a Clorox Bleach wipe to wipe the faucet, handles, counter top and the items I keep on the counter (Q-tip holder, toothbrush holders, wet wipe box).
-I use the Clorox Toilet wand with a fresh cleaning bad to scrub the sink. *When you are done, don't throw it away. You will use the same pad to clean the toilet.

2. Clean the toilet:
-First I use a Clorox Bleach wipes to clean all the surfaces of the toilet tank, including the flush handle.
-Next I clean both sides of the toilet lid and seat, paying careful attention to the cracks and seams. I then wipe of the toilet rim, including the odd space between the seat and tank.
-Use a clean wipe to clean the entire outside of the toilet (below the rim). This includes the structures on the backside under the toilet and the joint where the toilet meets the floor.
-Lastly, I use the Clorox Toilet wand (with the same pad I used to clean the sink) and clean the inside of the toilet. Don't forget to clean under the rim where the water comes from. Discard the pad in the trash when done. Do Not flush it!

3. Clean the bathtub:
I'll admit that I save this step for when I'm actually in the shower. For me, it's just easier on my back than leaning in an awkward position trying to scrub everything. For general cleaning, I use my soap dispensing scrubber filled with a 50/50 mixture of Dawn Dish soap and vinegar. I make sure to scrub the walls, window sill, plumbing fixtures, bathtub and rim of tub. Make sure to pay careful attention to tight corners and angles. For the stubborn, hard to clean "ring around the tub", I use the Mr. Clean Magic Eraser after I've scrubbed and disinfected everything with my soap dispensing scrubber.
Back to the regular cleaning routine:
-I use a clean Clorox Bleach wipe to wipe the edges and outside of the bathtub, including the seam where it meets the floor.
-I finish by spraying the shower curtain with Febreeze to freshen it up a little.

4. Extra stuff:
-At this point, I clean my mirror with Windex, tidy up my towels and magazines, and empty the trash can. I also like to use a Clorox Bleach wipe to clean all door knobs, light fixtures, light switches, vanity drawer handles, picture frames, and ledges.
5. The floor:
After I've finished everything else, I move on to the floor. This is done in multiple steps.
-First I take everything off the floor and move them into the hallway.
-Vacuum the entire floor, using the hose and nozzle for getting behind the toilet, in corners and under radiator. Yes, I vacuum my bathroom. I find it easier and more thorough than sweeping.
-Next, I spray the base of toilet, floor, and walls under, around and behind the toilet with Vinegar and peroxide. Use a generous amount and make sure to thoroughly soak the grout lines. Let it sit a few minutes. Wipe it up with a used towel or lots of paper towels.
-The last thing I do is use my Libman Freedom mop with Pinesol to wash the floor. Don't forget the area around the toilet.
*Once you put the trash can and (in my case) step stool and magazine holder back in place, you are done!! This takes me about 20 minutes to complete. Nice and easy!
*Additional Bits and Pieces*
-To neatly store shopping bags for the trash can, I keep them in an empty tissue box under the sink. I have one in each bathroom.

-To neatly and stylishly store magazines and other reading materials, I use a rectangular planter that matches my decor.

-To neatly and easily store Clorox wand refill pads, I keep them in an empty glass jar. This also allows for hands free dispensing. I keep one jar with a wand in each bathroom.

-I try to keep the space under my sink as organized and clutter free as possible. I try to keep cleaning products I use regularly (though this picture has a few extras). I also try to keep the toilet paper nicely stocked (again, not so much in this pic).
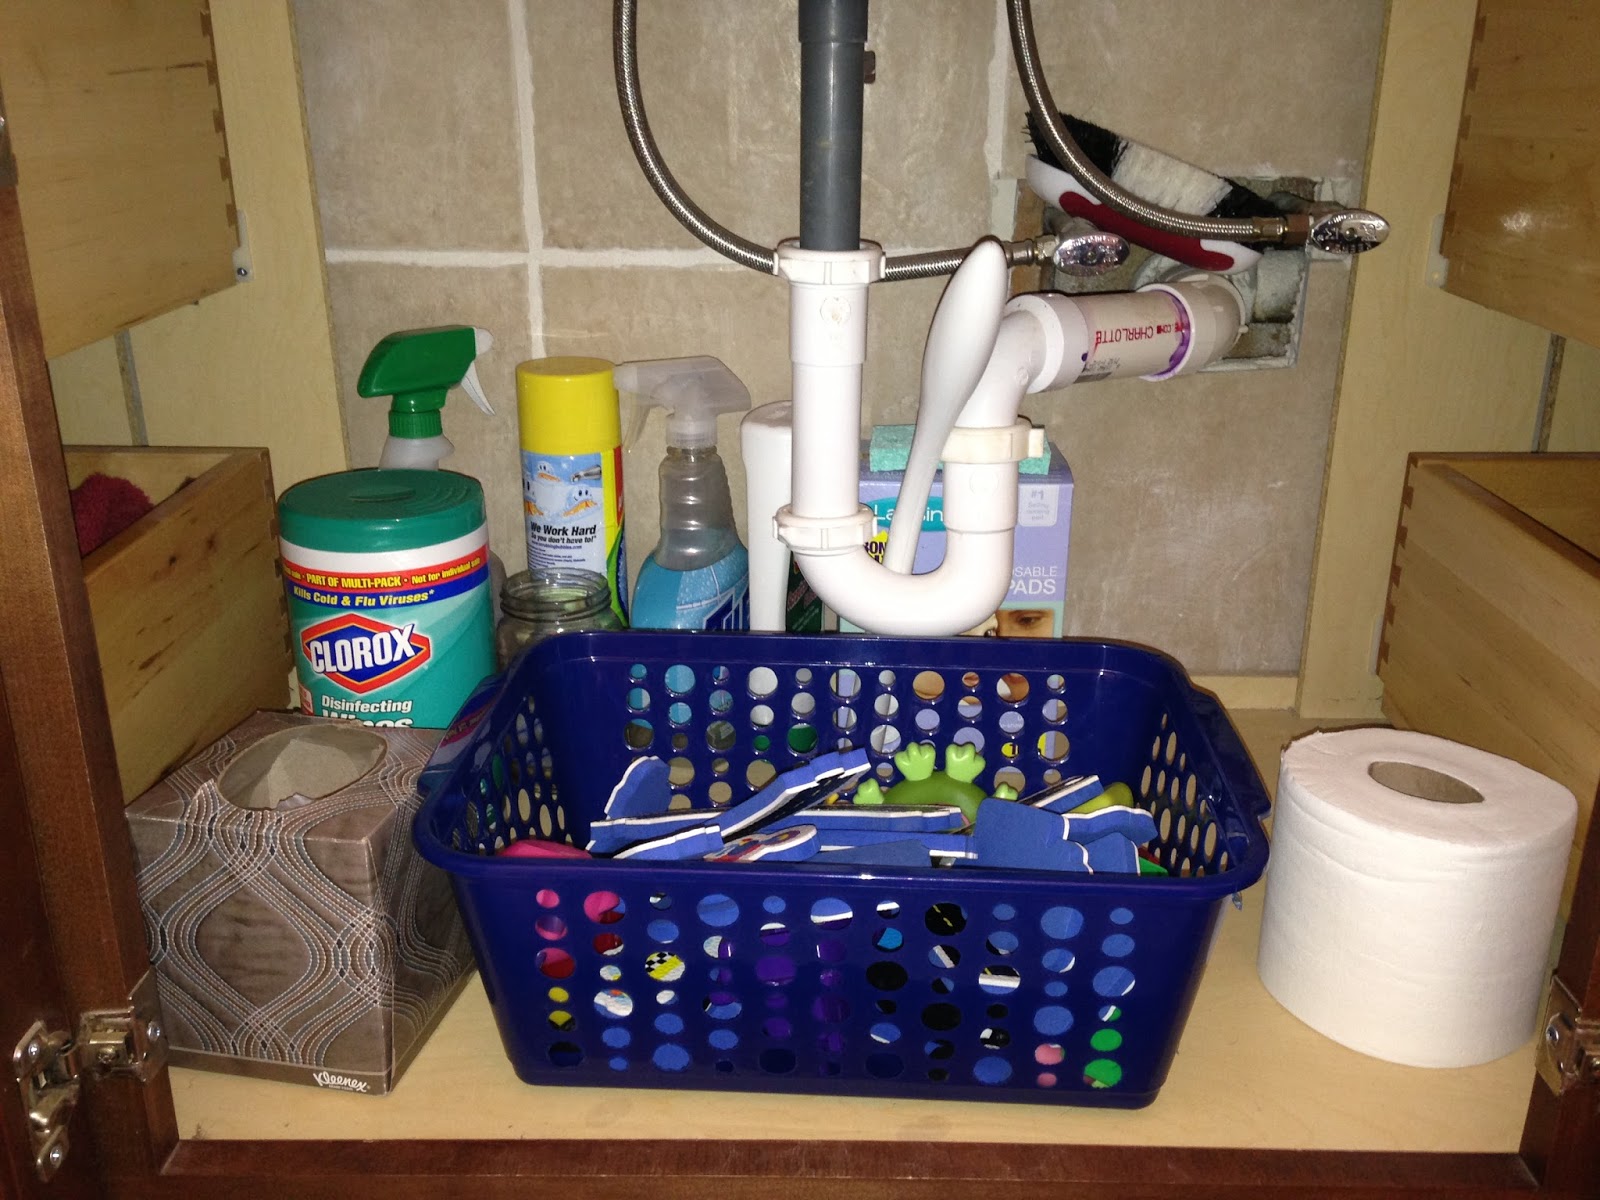
Hopefully this blog has helped to make your bathroom neat and clean, and you learned that it's not that hard to do.
Happy Cleaning!!
Subscribe to:
Comments (Atom)